 Widely recognised as the world leader in the design and manufacture of transmission and drive train technology, Xtrac has built its business and reputation on a passion for innovation, precision and quality. So, when the company needed a metrology supplier with like-minded principles, the Thatcham based Company naturally turned to Mitutoyo.
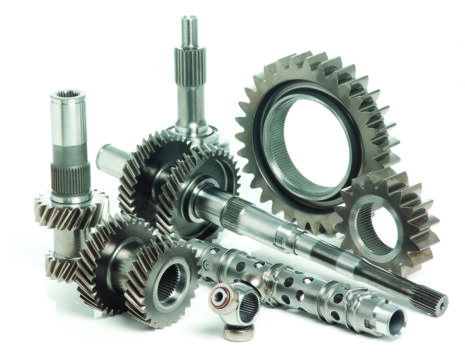
Established in 1984, and manufacturing everything from casings through to gears, shafts, crown wheels and pinions and everything else that constitutes a high performance motorsport transmission system; Xtrac utilises high specification casting, milling, turning, grinding, EDM, surface finishing, gear cutting and grinding technologies – all inspected with Mitutoyo metrology equipment.
Xtrac Inspection Manager Mr Neil Warwick has been at the staff owned business since it was a small 15 employee company back in 1988. At the once fledgling company, Mr Warwick was instrumental in specifying Mitutoyo equipment almost 30 years ago. Recalling the first Mitutoyo CMM the company purchased, Mr Warwick says: “At the time, all our customers in the motorsport and F1 industries were employing Mitutoyo equipment. We looked at what they were using and we wanted equipment to create a synergy with our customers. Except for the machine shop micrometers, our first foray into Mitutoyo was a manual BHN706 CMM in 1990. This was rapidly followed in the mid-1990s by Mitutoyo BHN544 and BNH706 CNC CMMs as our business rapidly expanded in line with the F1 industry widely employing our transmission technology.”
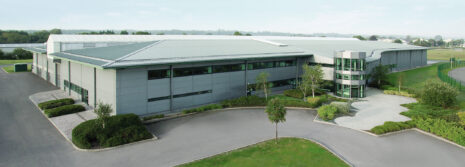
In 2000, the company moved to its purpose built 88,000sq/ft UK factory to accommodate its exponential growth and this noted the arrival of numerous Mitutoyo inspection systems to support the increase manufacturing output. The Berkshire business retained its Mitutoyo CNC CMM systems with Renishaw PH Series motorised indexing heads that enable the CMM’s to achieve complete programmable probe orientation. Attached to the motorised Renishaw heads are the TP200 Series of probe bodies and stylus modules from 1mm to 6mm diameter. With CMMs in satellite inspection rooms on the shop floor as well as in the main inspection department, Xtrac specified the same probe bodies and styli for all its CMMs.
Since moving to its state-of-the-art facility over a decade ago, Xtrac has expanded to 330 staff with 20 employees in the meticulous inspection department. As part of this growth, Xtrac acquired two compact CRYSTA-Apex S544 CNC CMMs with a 500 x 400 x 400mm work area. One was bought to support growth and the other to replace an ageing CMM. For the inspection of larger components, Xtrac purchased a CRYSTA-Apex C9106 CNC CMM with a 900 x 1000 x 600mm working area. These three CMMs were accompanied by the arrival of three CRYSTA-Apex S776 CNC CMMs in the last two years. These most recent arrivals were all direct replacements for the BHN Series CMMs that had been at Xtrac for over 20 years.
Commenting upon this, Mr Warwick recalls: “The fact that we’ve had Mitutoyo CMMs for 20 years speaks volumes for the performance, reliability, consistency and ability of Mitutoyo CMMs to conform to our impeccable standards. Naturally the CMMs have evolved from the old DOS based systems.”
“All our CMMs now run on Mitutoyo’s Windows based MCOSMOS 3.5 software. The technology in the modern CMMs and particularly the MCOSMOS software enables us to import CAD data, program our parts faster, improve both on and off-line part-program creation from imported CAD models and also extend our geometry handling of freeform surfaces. Added to this, the axis movements and motors in the new CMM’s are faster than previous generation CMMs, resulting in reduced inspection cycle times”
Creating a synergy:
All six CMMs at Xtrac utilise the same Mitutoyo MCOSMOS software, the same workholding jigs and fixtures and also the same Renishaw probing systems. Alluding to this, Mr Warwick says: “We have a number of CMMs on the shop floor as well as in our inspection department. All CMMs are networked, so we can easily transfer programs and data to reduce programming times and eliminate program duplication. This can make inspection as simple as just a ‘touch of a button’ on the CMM.”
This level of automation is critical for a company that manufactures complex parts in small batches with an often high level of SPC and reporting required. “All our customers are different in their demands. Some customers require complete reporting and traceability whereas other customers only want inspection data for critical features. Whatever the requirement, the Mitutoyo CMMs provide comprehensive reporting on all geometrical tolerances and features, if the customers need it. Furthermore, this data is all stored on our system for historical traceability purposes.”
Tracing a strategy for success:
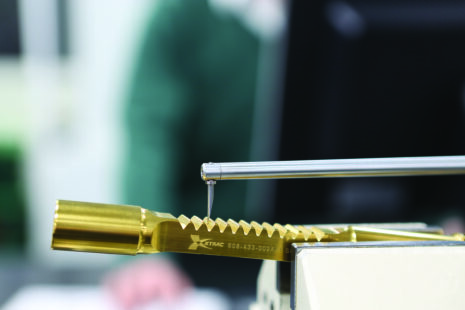
With the ever increasing complexity of parts, a CMM cannot support the measuring of all geometries and features. This was apparent for Xtrac when a particular F1 component had undercuts on form gears that needed to be machined and measured to tolerances of +/-5 microns. Commenting on this, Mr Warwick recalls: “We had a specific need to measuring a feature that couldn’t be resolved with a CMM. We got in contact with Mitutoyo and they recommended a Contracer.”
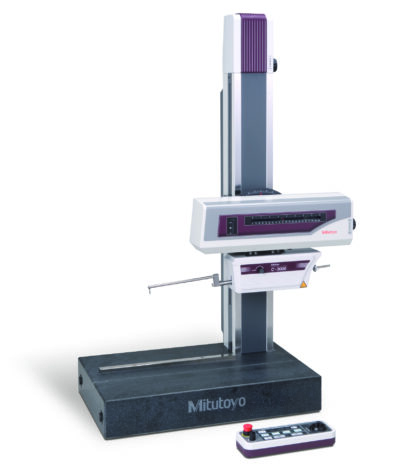
The Formtracer contour measuring machine delivers extremely precise and simplified CNC measurement. Featuring a precision arc-scale built into the Z1 axis detector that allows the arc trajectory of the stylus tip to be read directly, the Formtracer SVC-3100W8 specified by Xtrac minimizes error for best in-class accuracy. “The Formtracer arrived over 10 years ago, but we quickly realised how the Formtracer complements the CMMs. With the inclusion of surface texture measurement hardware the Formtracer also supplemented the basic surface texture measurement equipment that was currently in use at the time.”
“The capability and success of the Formtracer soon brought the arrival of two Contracer CV-3100H8 machines with an X and Z2 axis travel of 200mm and 500mm respectively. This was followed by a smaller CV-3100H4 machine. We use our Contracers for the 2D measuring of many non-geometric shapes and features such as undercuts, grooves and very small radii. They are fast, efficient, precise and perfectly meet our needs.”
The increasing demand for surface texture measurement, especially for gear teeth, quickly became too much of a capacity restraint for the Formtracer, leading to the purchase of dedicated, fully featured surface texture measurement machine. “We needed to increase surface finish measurement because some gear surfaces are in continuous contact with other surfaces. By controlling and measuring surface finishes on faces that are critical to the function of a component, we have minimised abrasion and enhanced the quality of critical gears and their operational functionality. The Formtracer has two heads, so it was conducting surface finish measurements as well as checking complex geometries. Before we knew it, we were loaded with work for the Formtracer, so we added a Mitutoyo SJ-500P Surftest for alleviating the capacity on the Formtracer.”
The SJ-500P is a high precision, high-performance surface roughness tester with PC control and the same software as deployed on the Formtracer, so training wasn’t an issue. The built-in joystick on the control unit enables quick and easy positioning whilst a manual adjustment knob allows fine positioning of a small stylus for positioning.
Concluding upon the working relationship with Mitutoyo, Mr Warwick says: “In my 29 years with Xtrac, we have evolved from a small innovative business to a global leader in drive train and transmission systems for the most demanding motorsport and high performance engineering applications. Along our journey to global success, Mitutoyo has been at our side. Firstly, we had micrometers and vernier callipers, then manual to CNC CMMs and now the addition of Contracers, Formtracers Optical Projectors, and surface texture measurement.”
“Down the generations, Mitutoyo has been at our side, supporting all our metrology needs with industry leading products, training and support. Over this period, the rapid emergence of ever more complex components required at shorter lead-times with greater certification has been comfortably managed by the Mitutoyo equipment. This is credit to the software and technology that networks all our metrology equipment and delivers comprehensive reporting of all the required dimensions and data.”
