 Currock Engineering Co. Ltd. is a major supplier of total solution packages to the global Aerospace sector and to several other equally demanding industries. Established in 1963 as a sub-contract machining and general engineering business, by 1995 the urgent need for additional space to install further machine tools prompted a move to the company’s present Chelmsford, Essex location. Now employing 91 staff, over several decades, Currock has considerably extended its range of specialties and increased its impressive collection of advanced machine tools.
To support its manufacturing operations the business operates a well-equipped quality department. The mainstay of Currock’s component inspection operations is its collection of Mitutoyo Coordinate Measuring Machines (CMMs). The company’s highly-efficient CMMs are controlled by state of the art computer software that allows them to accurately inspect components against pre-programmed data by means of fully automated, CNC measuring routines. Following a measuring routine, Currock’s Mitutoyo CMMs are able to generate the kind of traceable, detailed inspection reports that are so essential to the Aerospace Industry. These reports can be archived or supplied directly to the company’s customers.
Having experienced a significant rise in business over the past couple of years, the increasing throughput of components passing through Currock’s busy inspection department recently began to place a strain on the business’ existing Mitutoyo CMM provision, therefore a decision was made to purchase an additional machine. As the company is planning to manufacture high-volumes of more complex, larger components, a search was made for a high-specification, large capacity, fast acting CNC CMM.
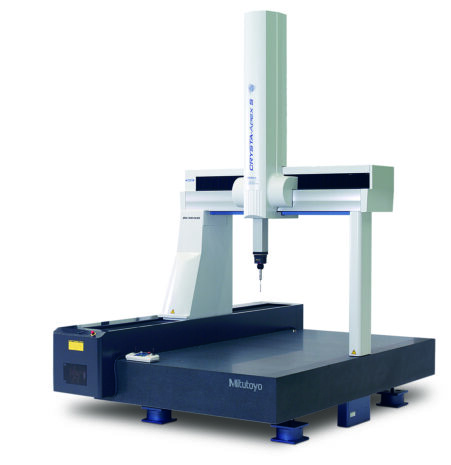
Although happy with the performance of its existing Mitutoyo CMMs and the services provided by Mitutoyo UK, mindful of the technical advancements that could have been made by other CMM manufacturers, and in accordance with the company’s policy of testing the market before committing to a capital purchase, in addition to Mitutoyo, other leading CMM brands were considered. Even though a couple of the alternative CMMs adhered closely to Currock’s demanding specification and capacity requirements, neither matched the performance of the equivalent Mitutoyo machine, therefore an order was placed for a Mitutoyo CRYSTA Apex S CNC CMM with an xyz capacity of 1200 x 2000 x 1000 mm.
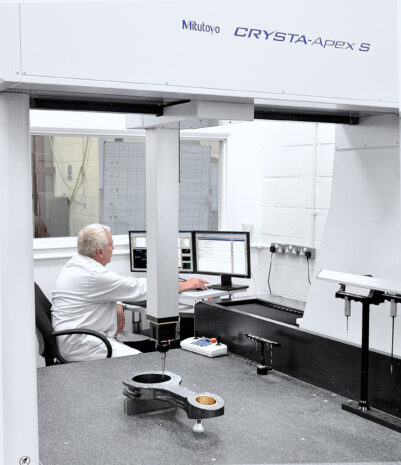
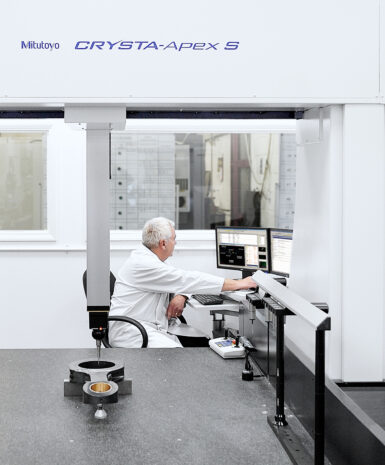
Now installed and fully operational, the advanced CRYSTA-Apex S CNC CMM brings Currock’s Mitutoyo CMM count up to four machines. Although purchased primarily to accurately inspect the company’s larger components, the generous size of the machine’s granite bed also allows multiple smaller parts to be loaded and fully automatic CNC, mass measuring routines to be quickly performed. The ability of the new Mitutoyo CMM to accommodate the company’s largest components and to perform rapid, mass measurement tasks has ended the possibility of inspection delays and will ensure that Currock’s quality department will be able handle all anticipated production increases.
Currock Engineering Co. Ltd. Operations Manager, Mark Burrows explained. ‘As a business that is dedicated to providing products and services of the highest quality, we first obtained registration to the British Standard for Quality Management Systems, 855750 Part 2 in 1993. Since then we have continuously improved our systems so that today, as well as being registered to the current International Standard for Quality Management Systems, BS EN ISO 9001:2008, we are also approved to the Aerospace Standard BS EN 9100:2003 and signatories to the SC21 Action Plan.”
“As well as our National and International Standard approvals, we are a preferred supplier to many major, multi-national customers and are a certified supplier listed in the International Aerospace Quality Group – Online Aerospace Supplier Information System (IAQG-OASIS).”
“Our continuing commitment to the quality of our output is illustrated by the recent installation of our largest capacity CMM yet, in our specially extended Quality Department. To ensure that our new Mitutoyo CMM delivers the best possible standards of precision, we have also installed a highly efficient environmental control system.”
“The speed and accuracy of our large capacity CRYSTA-Apex S CNC CMM has already made a significant contribution to our inspection function. As well as easily handling the largest of our parts, its ability to inspect multiple smaller components in a single set-up, in a rapid, automatic CNC mode, has considerably speeded-up the throughput of work in our Quality Department.”
Given the speed of today’s high-yield machine tools and the sheer volume of parts produced by them, ensuring that component inspection systems keep pace has never been more important. Add to this the ever increasing complexity of components and the tighter dimensional tolerances being applied to them and it is easy to understand that the performance of CMMs is being challenged as never before. To help overcome these problems Mitutoyo provide CMMs across a wide range of capacity, speed and accuracy classes. In addition, the availability of a wide variety of both contact and non-contact probes and other useful accessories, further enhances Mitutoyo CM Ms’ flexibility and enables them to perform countless measurement tasks with great efficiency.
The advanced Mitutoyo CRYSTA-Apex S CNC CMM, as purchased by Currock Engineering, is able to makes very accurate measurements at the high-speeds that are so essential for keeping pace with today’s manufacturing output. The innovative CMM series comprises a comprehensive line-up of CNC CMMs, including small, medium and large capacity machines. The use of lightweight materials and innovative machine structures ensure the delivery of high motion stability and impressive accuracy. Further extending their flexibility and effective measurement capabilities, each CRYSTA-Apex S series CNC CMM is compatible with both vision and scanning probe technologies.
In addition to being installed in dedicated inspection facilities, due to the range’s innovative temperature compensation function, CRYSTA-Apex S CMMs are equally at home taking accurate measurements when located on the shop floor. The advanced CMMs also represent a future-proof investment as, mindful of future technical developments, probe systems and software can easily be changed, or added to the system, when required.
