 Rather than acquiring manufacturing plant on a piecemeal basis, the practice of companies purchasing and using machine tools of various categories from single, preferred vendors is now firmly established. For example, milling machines of a particular brand would be used by a company, whilst grinding machines and EDM machines from two other manufacturers would be employed.
This brand loyalty can be motivated by a range of factors including the price and the technical ability of the chosen brand, to the reputation of the machine tool manufacturer concerned and the levels of service they provide.
The advantages of pursuing such a single brand, per machine tool category policy, includes the flexibility provided by the users’ machine operators being able to swap between machine tools featuring identical operating systems. Also, following the installation of a newly installed machine, operator training times are much reduced.
As with their machine tools, more and more forward-thinking businesses are now adopting a single measurement system vendor philosophy. Today, many inspection duties are carried-out by production personnel on the shop-floor, rather than being undertaken by dedicated staff in QC departments located away from the point of manufacture. As measuring equipment is now commonly used by both quality and production personnel, given the huge difference between various metrology company’s operating systems and software, it makes sense that businesses are increasingly single sourcing their measuring equipment. One such progressive company that had adopted a single source measurement system policy is Glenrothes, Fife based A&D Precision Engineering.
A&D Precision Engineering Quality Manager, Harry Fernando explained. “In addition to reaping the benefits of favoring the products of certain manufacturers in each of the machine tools categories we use, we have extended this way of working across all of our quality and inspection endeavors. As we consider that a component is not made until it is inspected, it makes sense to us that we treat quality and inspection as integral parts of our production processes and that we expect the same levels of efficiency from our inspection functions as we do from our manufacturing activities.”
“Although, in the company’s early days we used metrology equipment from several sources, the reliability, accuracy and repeatability of our early Mitutoyo products and the excellent service we received f ram the company, meant that as the company grew, and our older metrology equipment needed to be replaced, we invariably invested exclusively in further Mitutoyo products. This has resulted in our measuring equipment inventory now consisting of 99% Mitutoyo products.”
“We now use examples of Mitutoyo technology in all of our measurement and testing areas, from our digital hand tools, through height gauges, vision equipment and surface roughness testing, to our quality department and shop floor-based Coordinate Measuring Machines.
“As we serve a wide range of challenging industrial sectors, the quality of our output is all important to all at A&D Precision Engineering. Our ‘belt and braces’ approach to quality means that in addition to in-depth final inspection routines being performed by our quality personnel, our skilled machine operators also undertake regular in-process quality checks. The robust nature and quality of our Mitutoyo equipment means that it consistently delivers the demanding levels of precision that we require in both our quality department and on our shop floor.”
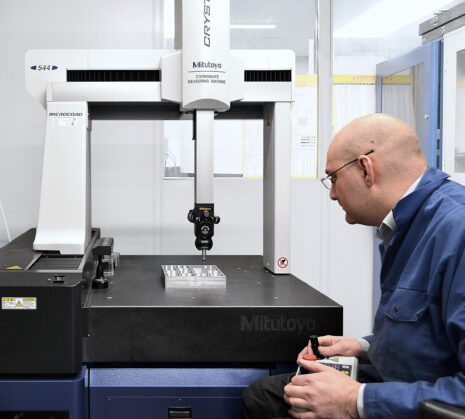
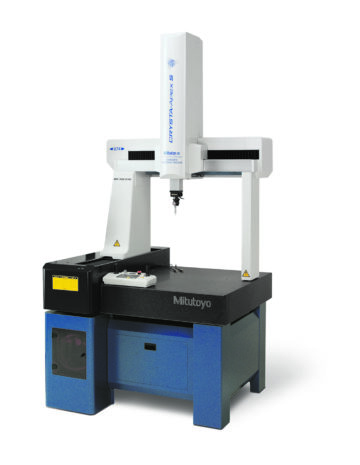
Just as A&D Precision Engineering use premium quality machine tools that deliver maximum levels of accuracy and productivity, the company’s management expect the same levels of precision and efficiency from its inspection equipment. These critical requirements are reflected in the company’s latest Mitutoyo acquisition, the recently installed, advanced CRYSTA-Apex S CNC Coordinate Measuring Machine.
The CRYSTA-Apex S Series of high performance, cost effective CMMs are designed and constructed according to Mitutoyo’s extensive experience in CNC CMM technology. Manufactured from advanced lightweight materials and boasting an innovative machine structure, the CRYSTA-Apex S Series delivers high motion stability, impressive levels of speed and accuracy and excellent affordability. Ideal for use within dedicated inspection departments or on the shop floor, the advanced machines feature a temperature compensation function allowing users to make accurate measurements in less than perfect environments.
To enable each customer to receive a CMM to match their exact needs, the CRYSTA-Apex S Series is available in a wide range of capacities. Also, these advanced machines can be further specified by the availability of a wide range of Mitutoyo vision and scanning probe technologies.
In addition to first-class hardware, Mitutoyo CMMs boast comprehensive analysis software for interpreting measurement results in the timely manner so essential for keeping up with today’s fast-paced production.
Harry Fernando concluded. “Following a trouble-free installation, our latest Mitutoyo CRYSTA-Apex S Series CMM is now delivering the promised levels of speed and accuracy. In addition to performing the manual inspection of one-off parts, having now written many inspection programs related to our regularly produced parts, our staff are now able to load the CMM’s bed with multiple components, recall the relevant program and instigate a rapid, fully-automated mass inspection routine. On completion of each measuring procedure our new CMM is able to automatically generate comprehensive inspection reports that can be supplied to our customers, or archived for future reference.”
