 Now regarded as one of the UK’s leading subcontract engineering business, it is difficult to believe that North Shields based, Chirton Engineering Ltd was established as recently as 2003. From relatively modest beginnings, the company has enjoyed a meteoric rise to prominence over the past 12 years. Today, Chirton Engineering is an internationally respected subcontract manufacturer that undertakes premium quality manufacturing for the demanding offshore oil & gas, renewables and automotive industries. Chirton is able to carry out a wide range of work, from the manufacture of one-off prototypes, to the production of large batch quantities.
Illustrating Chirton’s dramatic growth, the company began trading in a1000 sq. feet unit and employed just five highly experienced personnel. Now, following a couple of transitional moves, the company recently relocated to a 46,000 sqft hi-tech manufacturing facility.
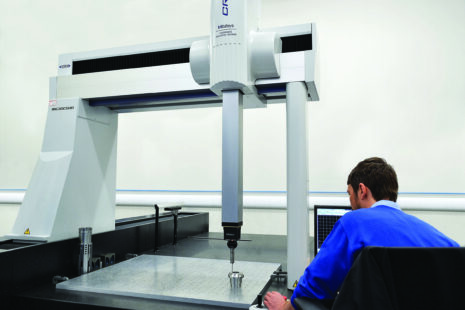
The company move, a substantial investment in further advanced machine tools and the resulting increase in output began to place a burden on the company’s quality control function, and prompted the purchase of an advanced Coordinate Measuring Machine (CMM).
Michael Morris, Chirton Engineering Ltd, Business Development Manager explained. “To enable the company to achieve the required levels of production and component quality, we pursue a policy of purchasing the best available machine tools. This strategy can be demonstrated by our recent £1million plus investment in 3 Mazak multi-tasking, CNC machines that are capable of producing large volumes of high precision components. Just as we follow a policy of working in partnership with our production equipment suppliers, over several years, we have also formed a close working relationship with Mitutoyo UK. Having bought our first small, manual Mitutoyo CMM more than 10 years ago, and enjoyed excellent service from it, due to increasing levels of business, we soon invested in a second, CNC version of the same machine, plus further Mitutoyo equipment.”
‘As each of our older CMMs have never given us a single problem, and given the excellent relationship we have developed with Mitutoyo UK, when the need recently arose for a large capacity CMM that could accommodate the larger, heavier parts that we are now producing, we again approached Mitutoyo UK. As well as increased CMM capacity, part of our new CMM requirement was that the purchased machine would allow a faster throughput of parts in our busy Quality Department.”
“Having considered our requirements, Mitutoyo’s technical staff concluded that the answer to our needs was an advanced Crysta-Apex S, CNC CMM with a capacity of X -1205mm, Y-2005mm, Z -1005mm, and the ability to accept a table load of up to 2000kg. To evaluate the accuracy and capabilities of Mitutoyo’s offering, and to confirm that the machine represented good value for money, we compared it to similar specification and capacity CMMs from other vendors. Having satisfied ourselves that the Crysta-Apex S had the required levels of precision, delivered the facilities we required, and that it represented excellent value for money, we were happy to place an order.”
“In addition to the CMM’s advanced CNC capabilities, we were impressed with Mitutoyo’s various software options and the potential advantages they would provide. Along with Mitutoyo’s standard MCOSMOS software, we purchased Scanpak and CAT/000 modules.”
The high accuracy, Mitutoyo Crysta-Apex S, CNC Coordinate Measuring Machine was designed and constructed using Mitutoyo’s vast experience in the field of CMM technology. The machine is built using lightweight materials and features a moving-bridge type machine structure to provide high motion stability. Mitutoyo’s hardware is only half of the story; the company’s renowned CMM software enjoys a reputation for being feature rich, whilst also being easy to use. MCOSMOS by Mitutoyo is a proprietary metrology suite of inter-related modules and dedicated expansion modules, allowing the integration of a series of applications, improving the productivity quality control functions.
Scanpak, as purchased by Chirton, is able to report the deviations from a nominal profile to determine if a measured contour is within its tolerance zone. Also, Scanpak’s patch scanning generator allows stitch scanning routines that help to define surfaces for reverse engineering. Patterns are saved for repeat jobs and can be used with a touch probe, sensor or continuous scanning probes such as the SP25 or MPP.
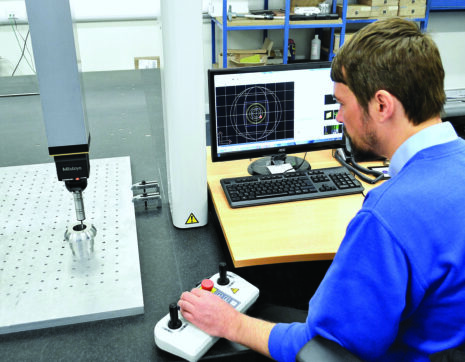
Also specified by Chirton, CAT1000 software allows all of the data required for measuring parts and for tolerance evaluations to be taken from the CAD model via a pointing device (mouse, Trackball) selection. The same principles apply for programming probe paths (clearance and measurement), whilst at the same time, using the nominal values directly off the CAD model for tolerance comparison. Now installed and working on a 2 shift system, the enhanced speed and increased capacity of the new Mitutoyo CMM means that complex dimensional inspection routines can now be made on the largest of Chirton’s manufactured components. When required, multiple smaller parts can be loaded onto the machine’s generous bed and inspected in a rapid, fully automatic CNC mode. The impressive accuracy specification of the Crysta-Apex S – (2.3+4L/1000) – means that the advanced CMM is also able to accommodate even the most precise of Chirton’s components.
Chris Clarke, Head Inspector at Chirton Engineering Ltd added. “We are BS EN ISO 9001:2008 UKAS accredited and work to strict certification standards in all our of manufacturing processes. As much of our growth is based on our reputation for the quality of our output, quality remains our number one priority In fact, in our company literature and on our website, we often use the phrase ‘We believe that quality isn’t expensive – it’s Priceless’. Although quality is of paramount importance to us, our ability to deliver on-time and on budget is also vital. In addition to investing in highly productive machine tools that provide the required efficiencies, our new CMM will help safeguard our quality, whilst significantly speeding-up the throughput of parts within our inspection department.”
“Due to the nature of many of our manufactured components, in addition to several other features, we are finding Mitutoyo’s Scanpak software’s rapid and accurate scanning capability extremely useful and time saving. Also, our use of Mitutoyo’s CAT 1000 software allows us to import CAD models and to program inspection routines off-line, further speeding-up the flow of inspected parts. Not only is our Crysta-Apex S, capable of measuring the largest and most precise of the components that we currently produce, we regard our new CMM as ‘future proof’ as its generous capacity and impressive accuracy specification will allow it to accommodate all anticipated future parts. The machine’s speed of action, combined with the use of the software modules that we ordered, has resulted in much faster measuring routines and has completely removed the possibility of inspection bottlenecks occurring.”
