 Investment quickly pays off for engine remanufacturer:
Autocraft Drivetrain Solutions, operating from a 56,000 square-meter site near Grantham, Lincolnshire, England, is the largest independent engine remanufacturer in Europe, supplying such well-known OE manufacturers as Ford, Jaguar Land Rover, Volvo, Aston Martin, JCB and Chrysler. Engines are not the only drivetrain components processed – the company also handles transmissions and precision-machined components such as cylinder heads and blocks, plus sub-assembly of automotive parts.
A new opportunity – and a challenge
In common with similar engineering concerns, Autocraft absolutely depends on fast and accurate production machinery backed by an efficient inspection resource to grow the business. This reality was highlighted recently when the company was presented with a commercial prospect involving inspection of various complex components, all manufactured to a high level of accuracy with specific reporting requirements. The production team felt their current metrology provider could not provide the level of support needed for this new business opportunity, as they had been let down both on machine reliability and back-up in the past. They realized that what was needed was a total metrology package covering 3D coordinate measuring, roundness testing and surface finish assessment capability, all supplied as a turnkey package by a company that could offer them the best level of expertise and support in the metrology industry.
After the usual evaluation of vendors, Mitutoyo was chosen as the preferred partner, but not without a degree of apprehension. As Alan Doughty, Autocraft quality manager, says, “It was a big gamble for us to go with Mitutoyo because we had very little experience with them, and our customer was also nervous, but it felt right at the time, and we are now convinced it was the right decision.”
Getting the right tools for the job
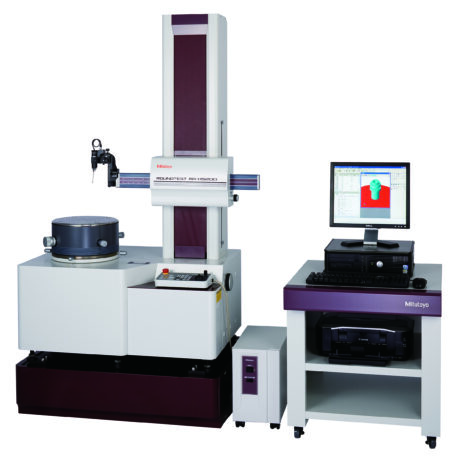
The equipment brought in was two coordinate measuring machines (CMMs), models Crysta-Apex S9168 and S9208, to inspect precision components such as cylinder heads and blocks; an RA-H5200AH Roundtest, which is a dedicated roundform measuring machine for components such as crankshafts and camshafts; and an SJ500 Surftest, a surface roughness tester acquired mainly to ensure that the ground finish of critical bearing surfaces is maintained at the correct material-ratio-parameter value (Abbott-Firestone analysis).
The new investment quickly paid off. The CMMs endeared themselves to the operators as being capable, quality machines, easy to use and providing no drama – just fast, accurate measurements, prompting the comment, “…we now have versatility on our CMMs…”. Similar sentiments were expressed for the Surftest, especially appreciated for its excellent functionality.
Difficult component measurement is tamed
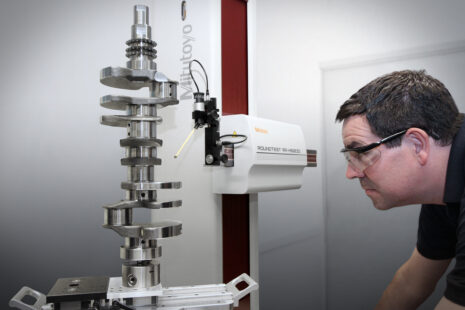
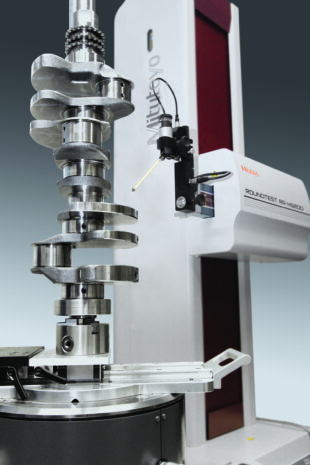
However, the star acquisition was the RA-H5200AH Roundtest, a highly accurate machine, capable not only of precision roundness measurement but also of characterizing many roundform characteristics such as concentricity, coaxiality, cylindricity, straightness, perpendicularity to axis and plane, flatness, axial and radial runout, as well as other parameters of interest for this unique class of component. An automatic centering and levelling feature makes the essential pre-measurement procedure of component axis alignment with the turntable axis a straightforward task for any operator.
A particularly successful application of the Roundtest was measuring roundness, straightness, parallelism and coaxiality of the main journals and crankpins of crankshafts. The challenge with this component was getting the crankpins in position ready for measurement, as the eccentric throw of the pins and the variety of crank angles make the task difficult to accomplish on a general purpose measuring machine. However, the solution lay in a dedicated fixture that was designed and built by Mitutoyo’s Gauging Technology division to mount on the machine’s turntable. This fixture clamps the crankshaft by one end in a chuck mounted on a linear slide so that the crankshaft is held vertically, while allowing it to be moved on the slide by the amount of crank throw so as to position any crankpin axis within the adjustment range of the automatic centering and levelling mechanism.
Roundness tester exceeds expectations
This was quite a departure from the measuring method traditionally employed for this problematic component and, initially, did not find universal favor, as Michael Hague-Morgan, Autocraft’s commercial & engineering director, and co-owner, says, “After some initial scepticism from our customer about using the RA-H5200AH for this component, they have since been blown away by its capabilities.” In fact, the possibilities opened up by this novel and highly cost-effective solution mean that Autocraft is now looking at new streams of business on the sub-contract side.
Hague-Morgan goes on to say, “This investment has enthused our entire inspection team now that they have quality equipment to work with. We now have data from the Mitutoyo equipment that enables us to converse with a customer in a way we never previously had, and as a result, has improved our customer relationships significantly.”
Solid support ensures a successful result
Autocraft were very satisfied with the support Mitutoyo provided for this turnkey installation. Hague-Morgan concludes, “Naturally, with a large project such as this, difficulties were expected, but what small problems did arise were resolved quickly and handled on the spot by the relevant Mitutoyo engineer. Nothing was too much trouble. Mitutoyo delivered what we asked for and more – fast, accurate and reliable machines with excellent support and a total commitment to us as their customer. Mitutoyo’s drive, commitment and enthusiasm to work with and support Autocraft was evident all the way from the MD through to technical support, service support and training.”
